
Saturday, 29 June 2013
Smoked Chickums

Green summer sauce

Ok, this is a lousy name, but trust me - the original "arugula-capers sauce" wasn't very descriptive either. Anyway. Make the sauce, it's great! I based it off a recipe in the Swedish food mag "Allt om Mat" but decided to eyeball a few things, use a little less of some, and add some other ingredients to make it my own. We ate it with baked cod, and a medley of roasted potatoes, beets and carrots. The remaining sauce - this recipe makes a lot - was awesome to dress a salad with roasted new potatoes the next day.
Green summer sauce
2 garlic cloves
200 ml creme fraiche
2 tbsp sour cream
2 tbsp greek yogurt
4 anchovy fillets (those tiny ones, sardeller in Swedish. NOT Swedish ansjovis!)
zest of one lemon
juice of 1/2 lemon
3 tbsp capers
big bunch of basil
40 g arugula
1/2 tbsp runny honey
1/2 tsp black pepper
This is just a matter of adding all the ingredients to your food processor, and mixing into a smooth sauce. Taste, and season as you see fit.


Roasted potatoes, tossed in the leftover sauce, with finely sliced red onions.
Wednesday, 26 June 2013
Kurobuta, Berkshire Lomo?

Saturday, 22 June 2013
Lemon Jelly Roll

Happy midsummer! I know it's mostly Sweden celebrating this odd holiday, but here, almost everyone does indeed celebrate. We, as most years, spent it with our friends, eating great food and a yummy strawberry-decorated cake. So, today, we had some other friends over for coffee and we wanted to do something fun and simple for "fika", which is what we Swedes call an afternoon snack to go with said coffee.
I am no master of jelly rolls, but I thought I'd give it a go. And success! It turned out really good. The above photo shows the plain cake, but we also served it with whipped cream, and of course, strawberries. Delicious!
(By all means make your own lemon curd if you feel like it. But I think it's fine to use a few short-cuts every now and then. Or hey, all the time, if you're so inclined.)

Lemon Jelly Roll
serves 6-8
3 eggs
140 g sugar
120 g flour
1 tsp baking powder
1 tsp vanilla sugar
3 tbsp boiling water
Filling:
about 200 ml lemon curd
Beat the eggs and sugar until pale and fluffy. In a separate bowl, sift flour, baking powder and vanilla sugar. Fold this into the eggs. Finish by carefully adding the hot water and mixing lightly.
Spread into a jelly roll pan, lined with baking paper. Bake for five minutes at 225°C. Take it out, sprinkle with sugar and then invert the cake onto a second piece of baking paper. Remove the first one - it might stick a little so be gentle - and cover the still-warm cake with the jelly-roll pan while it cools off. This prevents the cake from drying out.
When it's cool, trim the edges. Spread the cake with lemon curd, and roll tightly, starting at a long edge. Wrap in plastic, if you're not serving right away.
Serve with strawberries and whipped cream
Friday, 21 June 2013
Richard Bertinet's Somerset Cider Bread

When it comes to baking bread, I must admit that I have become rather lazy. I used to be quite into it, particularly with regards to sourdough. I used to have a starter called Veronica and at first, the relationship was quite intense, enthusiastic and bubbly; as you might expect from an early courtship. Many happy days were spent simply mulling and lounging around the kitchen in the warm, waiting for the slow rise under cotton sheets in feverish expectation of a tangy hit later in the day. Her crisp crust was quite exquisite too. Then sadly, other commitments got in the way. Soon, the thrill was gone, my eyes wavered and began to look around in other directions. We tried counselling a few times via the unnecessary application of a teaspoon and a hefty dose of flour and water which sparked a revival each time but it was always short lived. She was too needy and I didn't have the time to give.
Veronica left me. Blackened, musty and deep in shame. The ignominy of watching her seep slowly, downwards through the plughole is something that will probably stay with me forever but you have to move on, don't you. Just like Adele did, in that album of hers.
At the risk of sparking and evoking some damning ire, I have to say that it was all Dan Lepard's fault. He turned my head with his 'no-knead' technique which has enabled me to slam out loaves of bread with little care or thought; bang, just like that.
"What's that you say my darling? We have nothing to breakfast on tomorrow, the shops have shut and the children will starve in the morning? Have no fear, we still have time, for we have flour, water, salt and yeast! Too long? Mwahahahaha! Watch my precious, watch what I can create with a vigorous ten second pumping using the merest of my hands! Switch that oven on!"
Yes, if there is one thing that reduces me to ranting, raving, delusional demi-god, it is the no-knead technique (which OK, does need a teenie bit of kneading) and as such, this is singularly the only type of bread that I bake at home now. However, when I consider the abundant variety of recipes and methods that exist for this fundamental staple, I do realise that I am selling myself short. So recently, I decided to dip my toe back into the leavening pool and this week I tried out something that was a bit more involved and time consuming than usual. Which was Richard Bertinet's Somerset cider bread.
Now, in terms of technique, Bertinet's approach to kneading is totally different to what I've become used to, insofar that it is a lot more energetic. Actually, when I first bought his book Dough, some time ago now, I recall watching the accompanying DVD and wondering if I had paid for some bizarre food-led exercise video. I had my feet up on the sofa, I had a beer in my hand and I distinctly remember thinking "Sod that for a game of soldiers."
Basically, his guiding principle is to scoop up the dough (which at first resembles flabby porridge) with both hands and you raise it, stretch it, flip it and slap it back down on a flourless surface, all in one fluid motion. And you repeat this action over and over until the dough becomes silky and smooth. This video will give you more of an idea but essentially what he is trying to encourage is that you get as much air into the dough as possible. So yes, it's all very aerobic and looks like it all amounts to hard work, inducing beady foreheads and sweaty bum cracks and whatnot. However, once you get the hang of it, the method is relatively easy. And watching the mix transform from a glutinous mess into something that is quite pliable, buoyant and alive is quite magical, therapeutic even.
I had forgotten all about this part of making bread and this recipe, which calls for a ferment to deepen the flavour of the bread, certainly slows things down a bit and imbues a sense of steady, calm to proceedings. It has definitely kick started an old enthusiasm for baking. For in the fridge, there is now a pot of Veronica Mark II, skimmed off from a little bit of ferment left at the end. So we could be looking at a new dawn of experimenting with friendly bacteria (fingers crossed).
The only real dangerous part of this re-ignited interest is the potential for new levels of gluttony. Once baked, the loaves were probably only allowed about 10 minutes of cooling before I smote one in half with a serrated knife and slathered it with a pack of butter. It was delicious but if I keep this up, then the conquences for my health could be serious.
Perhaps Richard Bertinet could bring out a proper exercise video. Rather than use kettle bells or fancy pieces of elastic, perhaps the slapping and stretching of huge lumps of dough could form the basis for a funky and original calisthenic routine. It's just an idea.
Somerset Cider Bread
(the measurements for this recipe have been adjusted from the book, to make two loaves instead of four, because four would be ridiculous)

ingredients
Ferment
200g strong white flour
50g dark rye flour
5g yeast
5g salt
175g water
Main bread mix
5g yeast
375g strong white flour
125g dark rye flour
10g salt
300g good quality cider
flour for dusting
method
First make your ferment by mixing the initial ingredients together using the slap and tickle method as seen in the video and then leave covered in a floured bowl, in a quiet corner of the kitchen for about 6 hours.
It should go from this..........................................................................................................................to this


.
Then using a scraper, scoop out the ferment from it's container into another bowl, all in one piece, and add the rest of the ingredients and knead using the slap and tickle method again (refer to video). Shape the dough into a ball, put into a lightly floured bowl, cover with a tea towel and rest for 45 minutes.
 Turn the dough out onto a lightly floured surface and reshape into a ball, place it back into the bowl, cover with a tea towel and leave to rest for 45 minutes.
Turn the dough out onto your lightly floured work surface and divide into two equal pieces. Lightly flour another tea towel. Mould the balls of dough into loaves and place them onto the tea towel, making a fold in the fabric between them to stop them touching when they rise. Cover with a tea towel and leave to prove for 1 and half hours, or until they have nearly doubled in volume.
Remove and cool on a wire rack.
 They should look like this. Rustic, yet still very handsome
 And this is what I had left over to make Veronica Mark II
Tuesday, 18 June 2013
Green green salad
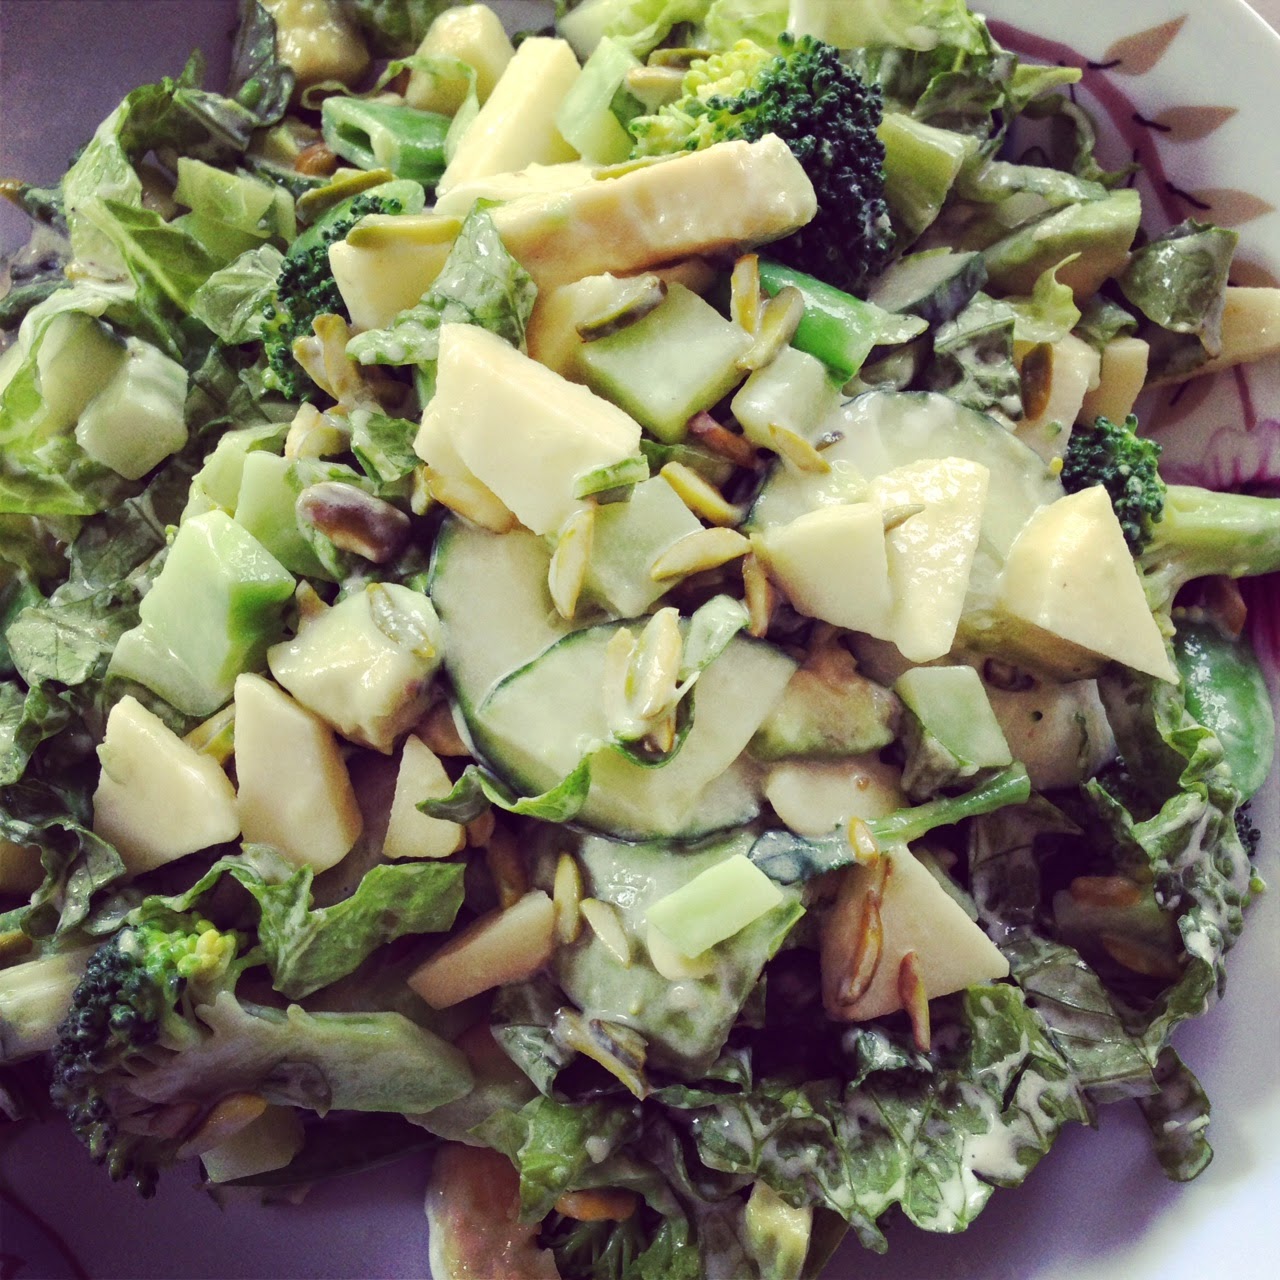
Dressing was a store-bought Caesar - pretty boring, next time I'll make something myself.
Sunday, 16 June 2013
Pickled Black Walnut

First I have to confess, if you look at my recipe for pickled walnuts in the Lost Arts, I think I left out something that might be important. I just poked them with holes and went right into the pickle. They were good, but I think the proper way to do it is to brine for a week, change the water and brine for another, then leave them out until they turn black (which is what you see here) and then go into the pickle. This one was half brine, half vinegar with extraneous spices and some sugar. It should be good. The only thing I'm wondering is if the shells inside will be edible. I passed a knife through, as you can see here, but certainly not as soft as regular walnuts. I also did a batch of those, and poked with pins. THIS time with rubber gloves on! I'll share the after photos in a couple of months, when the weather gets cooler.
Subscribe to:
Posts (Atom)